Let Istar help you get started on your project with our experience and know-how!
Upload your design files and production requirements and we will get back to you within 30 minutes!
SLA and SLS sound alike, and they both use a laser. Knowing the difference between SLA vs. SLS is very important. This article is the kind of guide I needed back then. It will explain Stereolithography (SLA) and Selective Laser Sintering (SLS) in an easy way. It will help you pick which of these great 3D printing technologies is the right one for what you need to make.
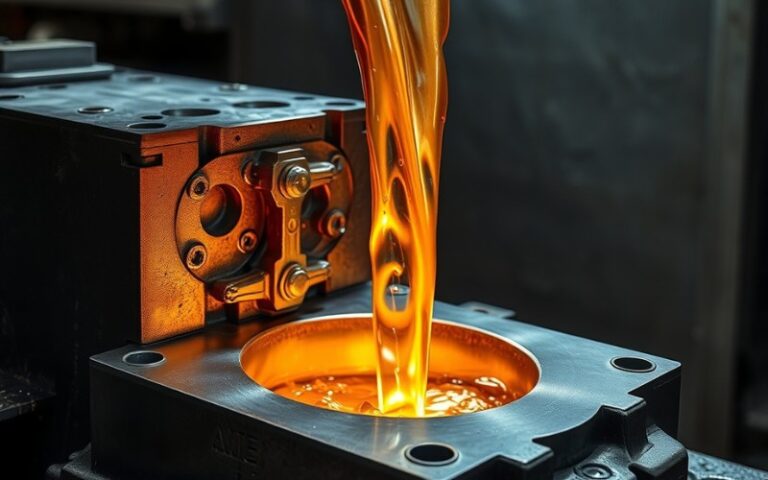
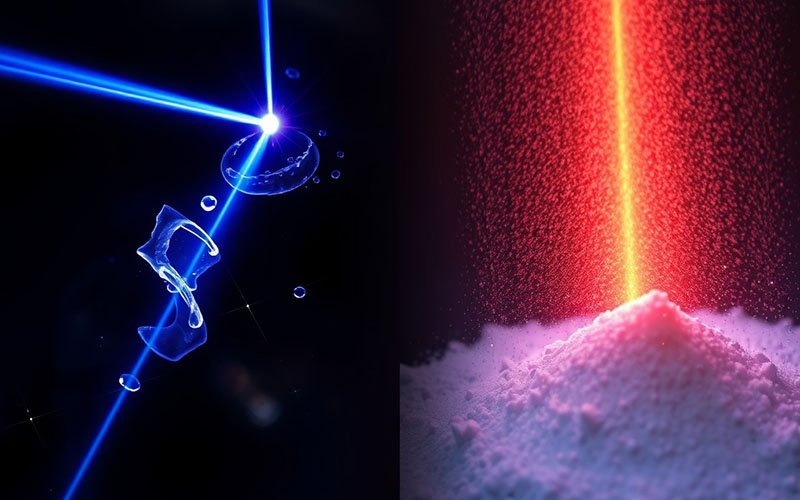
Let’s begin with the very first type of additive manufacturing technology, which is Stereolithography. When you hear someone say SLA, this is the technology they are talking about. To me, the SLA process seems like magic. An SLA printer starts with a container, which is called a vat. This vat is filled with a liquid plastic called a photopolymer resin. This liquid resin is special. It turns hard when a special kind of light shines on it. The SLA machine uses a very exact UV laser to trace the first layer’s shape onto the top of the resin. The laser beam touches the resin, and the resin gets hard right away. This is a very important part of the SL process.
After a layer is finished, the plate that holds the part moves up just a little bit. Then, a new layer of liquid resin covers the first one. The UV laser starts working again. It draws the next layer, sticking it to the layer underneath. This printing process happens again and again, layer by layer. This continues until your solid object is all done. It is a really cool thing to see. This SL method is very exact. That is why SLA printing is used so much for specific kinds of work. The SLA 3D printer makes your part from the bottom to the top. It uses light to make something out of a liquid. The SL system is really amazing.
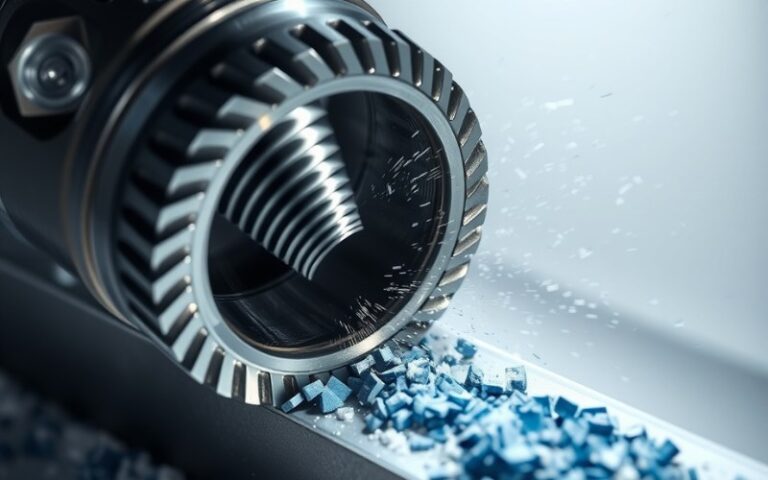
Now, let’s talk about the other great technology: Selective Laser Sintering (SLS). The SLS 3D printing process is also very smart, just like SLA. But it works in a very different way. It does not use a tank of liquid resin. Instead, an SLS printer uses a container filled with a fine polymer powder. This is usually a kind of nylon. Before printing begins, a roller puts down a very thin layer of this powdered material on the build platform. This is the starting point for the SL part.
This is the part where the laser is used. SLS uses a laser, a very strong high-powered laser, to heat the small bits of powder so they stick together. The laser traces the shape of your 3D model’s first layer into the bed of powder. This is called the sintering process. The powder gets hot enough to melt and join together. But it does not become a full liquid. After one layer is done, the platform moves down. A new layer of powder is spread on top, and the laser works on it. This SLS technology keeps going, layer by layer. It makes the part inside the container of powder. The way SLS works is very smart and saves time.
The biggest and clearest difference when comparing SLA vs. SLS is the printing material. It is a simple contest of liquid against powder. This is one of the key differences.
SLA uses a liquid photopolymer resin. This gives you many choices. There are regular SLA resins, strong resins, resins that can bend, and even resins for making jewelry. Because there are so many SLA materials, the SL technology can be used for many things. The qualities of an SLA 3D printed part depend a lot on the resin you pick. But, using SLA resin can be messy. You have to handle it with care.
SLS, however, uses a powder that feels like grains of sand. The most common SLS material is nylon (SLS nylon). It is a strong plastic that can be used for many jobs. There are other choices for SLS material, but SLS nylon is the most popular. The powder form is not as messy as resin. But you need to be careful not to breathe it in. The choice between SLA and SLS often starts right here, with the material you need for your part.
| Feature | Stereolithography (SLA) | Selective Laser Sintering (SLS) |
|---|---|---|
| How the Material Starts | Liquid Resin | Solid Powder |
| Main Type of Material | Standard & Engineering Resins | Nylon (PA 11, PA 12) |
| Number of Choices | High (Clear, Tough, Flexible) | Lower (Mainly Nylon types) |
| How to Handle It | Can be messy, needs gloves | Needs care for dust |
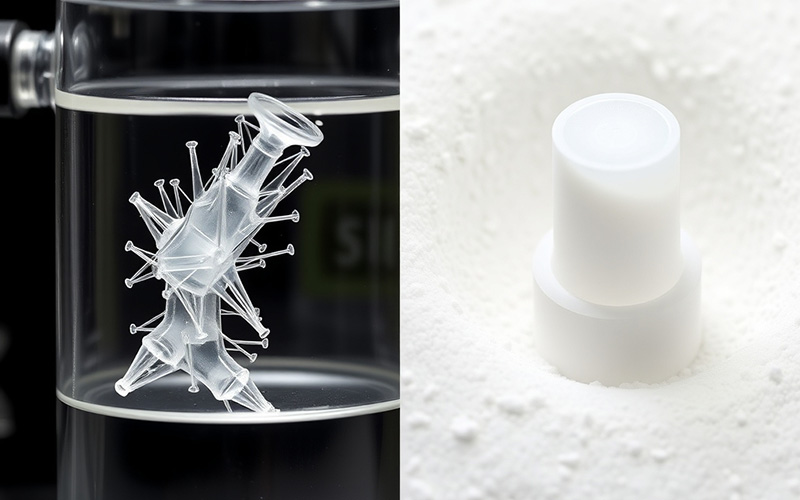
When we look at the SLA vs. SLS 3D printing process, the need for a support structure is a very big deal. When SLA printing parts in a liquid resin, any parts that hang over would fall or float away without help. Because of this, SLA printers have to build a support structure while they build the part. These supports are thin and look like a grid. They are easy to take off and they hold the part still. After the printing is done, you have to break off this support structure. Then you sand the spots where they were attached. This is extra work you have to do. The SL process needs this extra step.
SLS printing is not like that. Since SLS parts are made inside a big box of powder, the extra powder around the part works like a natural support structure. This is a huge benefit of SLS technology. It means you can print very complicated shapes. You can even print parts that are inside of other parts. You do not have to worry about adding supports. This gives you much more freedom when designing for an SLS printer. Unlike SLA, you do not need to add a special support structure. This efficiency is a big reason why many people choose SLS.
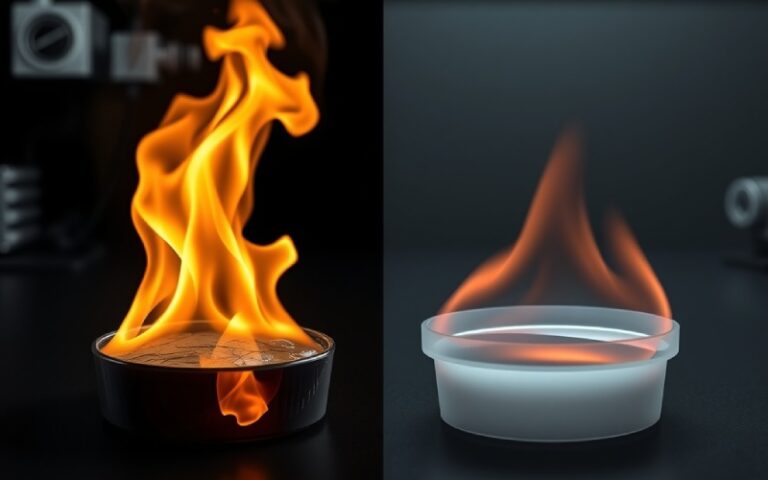
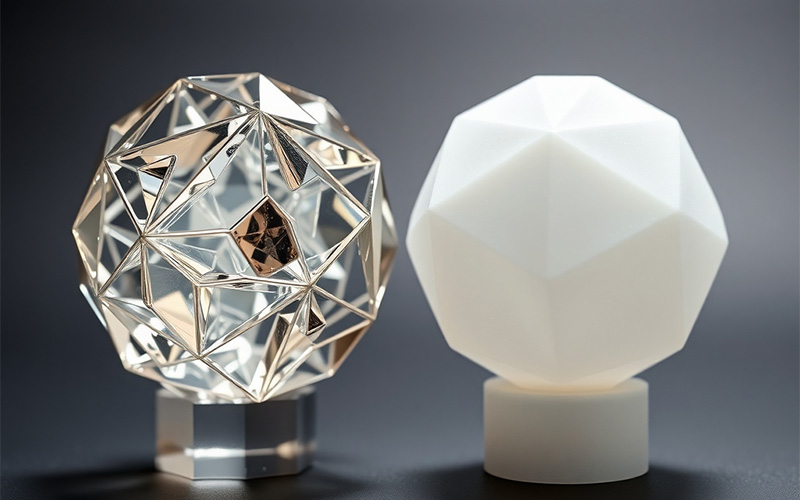
If you need a beautiful and smooth surface finish, SLA is the clear winner. The SLA process uses a precise laser to cure liquid. This makes parts with a very smooth surface. They almost look like parts made in a factory mold. You often cannot see the lines between the layers. This makes SLA a wonderful choice for models you want to show people, detailed small figures, or any part where looks are very important. SLA provides a finish that is hard for other technologies to create. From my experience, for models that need to look good, SLA is best.
SLS parts have a different feel. Because they are made from melted powder, they have a naturally grainy or flat surface finish. The surface is not rough, but it does not have the shiny smoothness that SLA gives. You can do extra work on SLS parts to make them smoother. But when they come out of the printer, they have a special texture. For many engineering parts, this surface finish is completely fine. But it is an important thing to think about in the SLS vs. SLA comparison. SLS excels at other things, but a smooth surface finish is a strength of the SL method.
This is where SLS is really great. If you need strong parts that last a long time and can handle being dropped or hit, SLS is often the better pick. Parts 3D printed with SLS nylon have good strength. They are also flexible and do not break easily on impact. They act a lot like plastic parts made in a traditional factory. This is why SLS is so popular for making functional prototypes and final parts that will be used. The mechanical properties of SLS parts are solid and you can count on them.
SLA parts, however, can break more easily. There are stronger engineering resins you can buy. But standard SLA resins can crack if you drop them. They are also affected by being in UV light for a long time. This can make them weaker as time goes on. For parts that need to look great but do not need to handle a lot of stress, SLA is perfect. But for parts that need to do a job, the SLS option is usually better. The SL part from an SLA printer may not be as tough as an SL part from an SLS printer.
So, when is using SLA the right thing to do? From what I have seen, you should choose SLA when your project needs one of these things:
Making a part via SLA is a wonderful choice for these jobs. The SLA system is made for this type of work.
Now for the other side of the SLA vs. question. When should you use SLS? The SLS technology is the clear choice for projects that need:
If your part needs to be very tough, use SLS. For parts that have a job to do, this SL process is hard to beat. The sls 3d method is a real workhorse.
Price is always something to think about. In general, smaller SLA printers for your desk are cheaper and easier for small companies and people to get than SLS printers. You can buy an SLA printer itself for a few hundred to a few thousand dollars. The resin can be costly, but it is okay for smaller jobs. The whole SL system for SLA is easier to start with.
Professional SLS printers are a much bigger purchase. SLS 3D printers are usually large, factory-grade machines. They can cost tens of thousands of dollars or even more. The powder material can also be expensive. But SLS is very good at not wasting material because you can use the leftover powder again. This can make the cost per part much lower, especially when you print many parts together. If you only need a few parts, using a 3D printing service for SLS is often a better deal than buying an SLS printer. The sls 3d printer is a big piece of equipment.
It is helpful to see where SLA and SLS belong among all the additive manufacturing technologies. The third major way to do plastic 3D printing is Fused Deposition Modeling (FDM). This is the one most people are familiar with. It is where a string of plastic is heated and squeezed out, like a hot glue gun.
Thinking about SLA vs. SLS vs. FDM helps you understand what each is for. Your choice between SLA and SLS depends on what you need most: detail, strength, or a lower price. Each 3d printer has its own best use. This is true for all 3d printing technologies.
Picking between these two great additive manufacturing methods can be difficult. Here is a quick list of the most important things I have learned about stereolithography and selective laser sintering: