Let Istar help you get started on your project with our experience and know-how!
Upload your design files and production requirements and we will get back to you within 30 minutes!
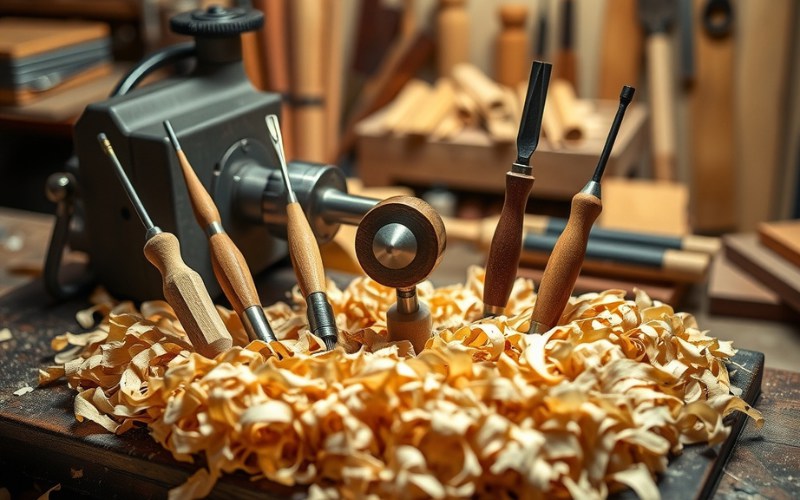
When I first started doing woodturning, I would look at all the different wood lathe turning tools and feel very confused. They all looked so much alike, but they were also very different. Which tool was for making a bowl? Which one did I need for a table leg? It took me a lot of time trying things and making mistakes to learn the answers. If you are just starting with a wood lathe, you might feel the same way I did.
That is the reason I wrote this guide for you. I am going to explain every basic type of turning tool you will come across. We will look at what each cutting tool is made for and how it makes a cut. When you are done reading, you will know for sure which tool to grab for your next project. This knowledge will help you save time. It will also help you make wonderful wooden items from the very beginning.
Before we look at each individual tool, let’s learn about the two main groups they belong to. Thinking about tools this way was a big help for me. The two types are cutting tools and scraping tools. A cutting tool has a very sharp edge. This edge slices through the wood fibers cleanly. It works almost like a knife cutting into an apple. This type of tool takes off material fast. It also leaves behind a pretty smooth surface. Gouges and skew chisels are part of this group.
The second group of tools is the scraper. A scraper tool does just what you think it does from its name: it scrapes the wood. It does not slice the wood. Instead, it takes off wood by removing very small shavings. I use a scraper to make a surface smooth after I have already shaped it with a cutting tool. It is not the right tool for taking off a lot of material. But it is great for making a shape better and getting a really nice finish. Knowing if you need to cut or scrape is the first thing to think about when you pick a woodturning tool.
When you put a piece of wood between the two ends of your lathe to work on it, this is called spindle turning. The best tool for this job is the spindle gouge. This turning tool has a shallow flute. The flute is the U-shaped channel on the top part of the tool. This shape helps you make many kinds of details on tube-shaped parts, like a chair leg or a wooden pen. This tool is useful for many things in this kind of work.
I use my spindle gouges to make curves, which are called a cove. I also use them to make round bumps, which are called a bead. The tool has a rounded nose. This rounded nose helps you roll the tool in a smooth way to make these shapes. You touch the tool’s edge to the wood, and it makes a clean cut that peels the wood away. This is one of the first turning tools I tell new people to learn how to use. It lets you have great control. You can use it in many different kinds of projects. Tools are used to shape the wood, and this one is an expert at making details along the workpiece.
If your goal is to make a bowl, then you must have a bowl gouge. This turning tool is not the same as a spindle gouge. The easiest way to tell it apart is by its very deep flute. This deep channel makes the tool very, very strong. It has to be strong. This is because when you shape a bowl, the tool is often held far out over the tool rest. A weak tool would shake a lot or even break. This strength is very important for your safety and for making a good cut.
The deep flute of the bowl gouge also helps move the wood chips out of the way while you cut. When you are carving out the inside of a bowl, you have to remove a lot of unwanted material. This tool does that job perfectly. The shape of the tool’s cutting edge is usually ground to look like a fingernail or is swept-back. This special shape lets you make clean push cuts on the outside of a bowl. It also lets you make great pull cuts on the inside of a bowl. It is the perfect turning tool for any kind of faceplate turning project.
Let me be honest. The skew chisel, which people often just call a skew, makes a lot of new woodturners nervous. It is a flat tool. It has a cutting edge that is sharpened at an angle. If you hold this cutting tool against the wood at the wrong angle, it can “catch.” A catch can wreck your project. It can even be unsafe. You will need to practice to learn the correct way to hold and to move this tool. So, why do we use it? We use it because no other tool can make such a perfect, smooth surface.
When you use it the right way, the skew makes a slicing cut. This cut leaves the wood so smooth that it almost does not need any sanding. It is the best tool I know for making a perfectly flat surface on a spindle. It is also the best tool for making a sharp and clean V-shaped cut. The tip of the skew is wonderful for adding very small details. I always tell my students to get some practice on wood you don’t need first. Learn what the tool feels like. Once you get very good with the skew, you will see that it is one of the most helpful turning tools you can own. Its power to make a great finish is better than any other tool.
The parting tool has one main job. That job is to part, or cut, your finished workpiece away from the extra wood that is holding it on the lathe. This turning tool is very thin. It is made to make a small, narrow cut into the wood. You hold the tool straight against the spinning wood. Then you slowly push it in. This is a simple step, but it is a very important one in the wood turning process. It is very hard to take your project off the lathe cleanly without a good parting tool.
But the parting tool can be used for other things too. I sometimes use my parting tool to cut an exact line to a certain deepness. This is helpful when you need to mark the size for a tenon. A tenon is a part that is made to fit inside a hole. Some parting tools are flat. Other parting tools have a diamond shape or a small flute. These shapes help them cut better and faster. It does not matter what the shape is. This tool is made to be very exact when you make a cut straight into the workpiece.
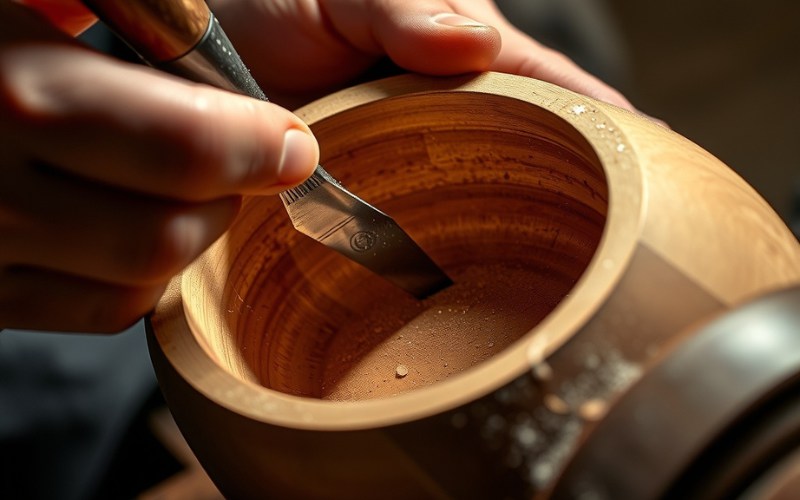
You should grab a scraper after you have finished the main shaping work with a gouge. A scraper is not a tool you use for the rough parts of the job. It is a tool for finishing. For example, let’s say you just finished hollowing out a bowl with a bowl gouge. The surface on the inside might have some small bumps or lines on it. You can use a round-nose scraper, held flat on the tool rest, to gently make that surface smooth. The tool shaves off tiny bits of material. This helps to create a much better finish.
Scrapers are made in many shapes. You can find round nose scrapers, square nose scrapers, and half-round scrapers. Each shape has its own special job. The round one is good for the inside of a bowl. A square one is helpful for the outside of a bowl or for making flat boxes. The most important part of using a scraper is to cut with the burr. The burr is a very small hook of metal on the tool’s edge. You make this burr when you sharpen the tool. This burr helps you get a cleaner cut than you would get by just scraping. It is a great tool for improving the shape of your project.
To help you remember, I have made a simple table for you.
| Tool Type | Main Use | Shape of Cutting Edge | Category |
|---|---|---|---|
| Spindle Gouge | Details on spindles (beads, coves) | Curved, shallow flute | Cutting Tool |
| Bowl Gouge | Shaping the inside and outside of a bowl | Curved, deep flute | Cutting Tool |
| Skew Chisel | Making a very smooth surface on spindles | Flat, angled edge | Cutting Tool |
| Parting Tool | Cutting work off the lathe, making grooves | Thin, straight or fluted | Cutting Tool |
| Scraper | Smoothing curves and making shapes better | Varies: round, square, flat | Scraping Tool |
| Roughing Gouge | Turning a square block into a round shape | Large, wide, shallow flute | Cutting Tool |
This is a very good question. These two tools look a lot alike, but they do very different things. A roughing gouge is a big, heavy turning tool. Its job is to do the hard, rough work. It turns a square piece of wood into a round, tube-like shape. It can take off a lot of material from a workpiece very fast. You should only use this tool for spindle work. You should never use it for a bowl. The way it’s made can make it catch when you do faceplate turning projects.
A detail spindle gouge is very different. It is a much smaller tool made for smaller work. After you have done the rough work, you can use this tool to add all the small details. Because it is smaller and has a thinner flute, it gives you more control. This control helps you make a small bead or a clean cove. You can think about it this way: the roughing gouge is like a big axe that you use to shape a log. The detail gouge is like a small knife that you use to carve a face. You often need to use both gouges to finish one project.
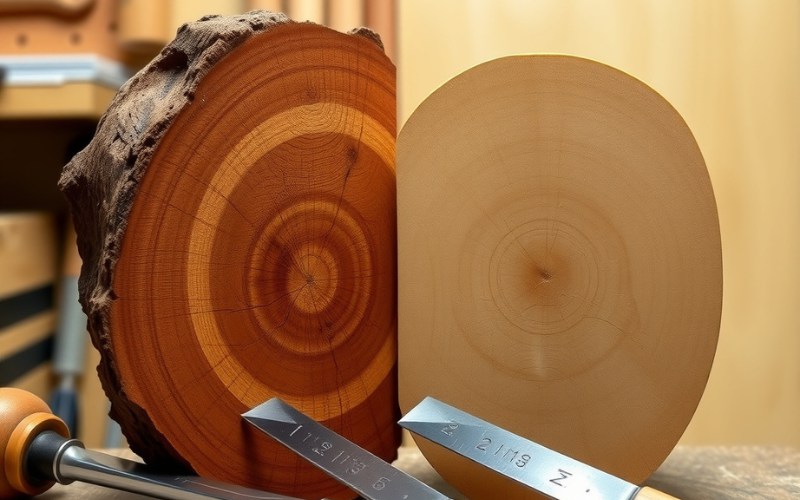
When you go to buy a turning tool, you will notice that most of them are made from high-speed steel (HSS). This is the kind of material you want to have. A long time ago, tools were made from carbon steel. But that kind of material gets soft when it gets hot from the rubbing action during cutting. High-speed steel was first made for use in factories. It is made to keep its hard edge even when it gets really hot. This makes it perfect for woodturning.
Because of this special material, your tool’s cutting edge will stay sharp for a very long time. A sharp tool is a safer tool. It also gives you a much better finish on your wood. When you buy a good set of HSS turning tools, you are buying tools that will last a long time and work well. You will get to spend more of your time turning wood and less of your time sharpening your tools. The grip, or handle, is also important. A wooden handle that feels good in your hand helps you control the tool.
If you are working on the inside of a bowl, the bowl gouge is your best option. If you are making a bead on a spindle, a spindle gouge is the perfect tool for that. The name of the turning tool will often give you a clue about what it is for! As you get more experience, you will learn these things over time. Do not be scared to try a different tool if one is not giving you the kind of cut you want. Every piece of wood is a little different, and sometimes you need to change what you are doing.
I can share the secret with you in just one word: sharpness. A dull turning tool will not be able to cut the wood fibers in a clean way. It will just tear them. This will leave you with a rough and ugly surface. It does not matter what type of cutting tool you own. It also does not matter how much money you spent on it. If the cutting edge is not sharp, you will have a hard time and get a bad finish. You need to learn the right way to sharpen your tools.
The second part of the secret is using the right technique, or the right way of using the tool. Every turning tool has to be held against the wood at the correct angle. This is how you get a clean cut. The tool should be resting firmly on the tool rest. Your grip on the handle should be strong, but you should also be relaxed. You have to let the tool do the work for you. You should not try to force the tool to cut. A soft, steady pressure with a sharp tool will give you a wonderful, smooth finish every single time.
Here are the most important things you should remember from this guide: